Showing posts with label ATM. Show all posts

Saturday, February 25, 2012

Solar projection scope prototype

Warning: With solar observing, be very careful not to look into the optical train, or you are likely to go blind.  Do not leave the optics unattended.  Watch for children!  Don't let any critters walk into the optical path.  Remember that as you experiment with the device, the optical path may be unpredictable.

I got the following lenses from Surplus Shed:

  • 150mm diameter PMN, 2600mm focal length (stock L3855D, $25)
  • 68.7mm diameter NMN, -800mm focal length (stock L4380, $4)
I cut out holes in the shipping box and mounted the big lens to one side of it.

Next, I cut a hole in a piece of plywood, and mounted the small lens in it, using pieces of an old bike inner tube to hold it in place.  I added two pieces of wood to the bottom of the plywood for a stand.

I had some used hard drive platters.  I used a pair of cheap Harbor Freight helping hands to hold one of the platters as a heliostat mirror (using the alligator clip to hold the platter through a piece of cloth so it wouldn't mar the platter too much). 

I set up the optical train on the driveway.  After some experimenting, I got it working.  Hard drive platter reflects light into the big lens.  About 80 inches further, the small lens stands.  A couple of meters further away (I didn't measure; my calculations suggest 6.3 meters as the correct distance, but it seemed closer to me), in the shade, I have a box with a piece of card stock taped to the side as a projection screen.  

Aiming hard drive platter to reflect the sun was easier than I expected.  (At this point, the safety stuff becomes crucial--make sure the sunlight doesn't get focused in anybody's eyes.  Likewise, make sure no animal walks into the optical train.)  I could see a bright spot reflected from the platter.  I moved the spot onto the big lens.  I could then see an unfocused spot on the ground between the big lens and the small lens.  I centered that spot on the small lens, and put the screen box to catch the image.  I then moved the small lens to focus the image.

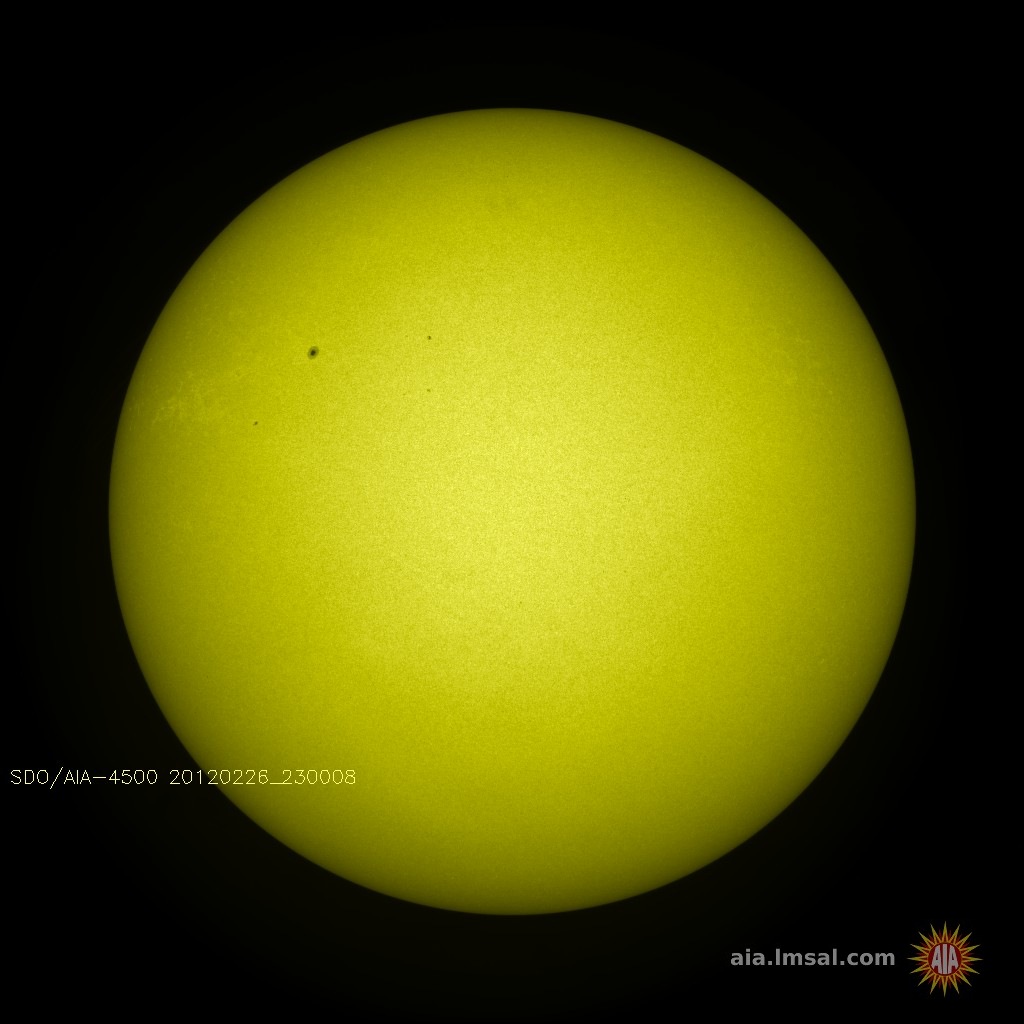
Result: Eight inch image of the sun.  Acceptable chromatic aberration along edges.  Moderately fuzzy.  One clear sunspot.  (Today's solar photo online showed a smaller sunspot near the larger one, and I did not see that.)  

It should work for the transit of Venus.  I hope it will get a bit sharper when I find a good way to collimate the setup, maybe with a laser.  Right now the collimation was all eyeballed (on the other hand, this is very long focal length work, since I am only using a small portion of the 150mm lens since the platter doesn't give much illumination, so it's less crucial.)  I also hope things will improve if align the optical train in such a way as to make the sun be closer to being at right angles to the mirror, which will increase the amount of the primary lens illuminated by the mirror.

At some point, I will try with a 3.5" diagonal instead of the platter, and if it makes a significant difference to quality, I may need to buy a mirror.

While one can no doubt be harmed if fairly well focused sunlight within the optical train hits the eye, it is worth noting that if the big lens is correctly pointed at the diverging lens, at no point in the optical train is there an image of the sun smaller than about 40mm, so the amount of heat concentration is not so great.

Monday, August 22, 2011

Fix for balance issue on 70mm F/4.3 refractor

My son's 70mm F/4.3 refractor had too easy movement, and couldn't balance with a 32mm Plossl eyepiece (it balanced fine with a light Kellner).  We added a tension adjuster on one side.

The second photo shows the right altitude bearing.  The nut is superglued in place.  If it ever comes unglued, I'll glue something on top of it to keep it in place, or replace it with a threaded insert, or think of something else.  The nut actually was a locknut, but I cut out a lot of the locking plastic, so its locking action is very mild.

And the last photo shows the inside of the mount.  The black ring is a superglued fiberglass washer.  On the other side, under the knob (you can kind of see it in the first photo) there is a superglued washer made from milkjug plastic (rough side facing the wood) so the knob doesn't come undone.

Friday, August 5, 2011

Another telescope instructable

And another one of my telescope instructables has been put on the home page of Instructables. This is my 8" F/4 travel scope.

Tuesday, August 2, 2011

My smaller Dobsonian instructable

Looks like my smaller Dobsonian telescope instructable has been featured as an editor's choice and is on the front page of Instructables. Yay!

Monday, August 1, 2011

Instructables space contest

Instructables is running a space-related stuff contest with nice prizes. I posted photos of four of the projects I described in this blog, and I encourage any readers to post their own projects.

Thursday, March 3, 2011

70mm refractor project just about finished

And we've almost finished the 70mm refractor.  I may still add some sort of sight for aiming it more effectively, though.

The tripod is made of cherry from a recalled crib that I picked up for scrap wood for free on Craigslist, together with some 1/2" Baltic birch plywood.  I glued two cherry slats side-by-side to form each leg.  The mount is a miniature Dobsonian mount.  The big round cutouts on the mount are to accommodate the oversize focusing knobs.  The azimuth bearing rides on PTFE pads and an old CD.  The altitude bearing uses PTFE pads and a plywood circle.

I had some trouble focusing a GSO 32mm Plossl in it--there wasn't enough focuser in-travel.  I suppose if I want to use that eyepiece with it, I can trim the top of the diagonal a little.

Sunday, February 6, 2011

70mm refractor

Finally we finished the OTA of my son's 70mm F/4.3 refractor.  It uses the Crayford-style focuser I described in my previous post.  I will update with build details later.  Personally, I think it's really cute.

Saturday, January 29, 2011

A simple wooden Crayford-style focuser

My son wanted to build a telescope out of a mailing tube we had, so we bought a 70mm lens (300mm FL).  The part of telescope making that I like the least is focuser-making.  But I think I now have a Crayford-style design that is very easy to make.  It is easier to make than my previous wooden Crayford and helical Crayford, and has about the complexity of my push-pull Crayford but works an order of magnitude better.

It's a block of hardwood (cherry, from an old crib), 2.75"x2.75"x1" in dimensions.  I used my drill press to drill out a 1.5" hole (A) in the middle for the 1.5" outer diameter aluminum focuser tube.  I then drilled a second hole, 3/8" in diameter, all the way through from one side to the other (B), so that hole A and hole B would meet and overlap by 1/16".  This second hole is for the focusing rod.

Finally, I drilled two more holes from one side to meet up with hole B (C and D) for adjustment screws that press on the focusing rod through PTFE pads, and tapped them to fit the adjustment screws simply by forcing a screw into the wood.  These PTFE pads (E) are small strips of 1/16" PTFE, bent into a C-shape, with the back of the C facing the adjustment screws.

I purchased an 8" x 1" x 0.0045" strip of self-adhesive PTFE tape (F) on ebay from mousetape.com for about $3 shipped.  I stuck a strip along one side of the focusing tube.

I then enlarged the 1.5" hole in the middle slightly.  My method of doing this was to use a sanding drum mandrel in my drill press with a somewhat oversized sanding drum (which would stick out on both sides past the work piece), with the work piece resting on another piece of wood with a hole in it, which was on the drill press table.  As a result, I could keep the work piece aligned at right angles to the sanding drum while moving it about so as to enlarge the hole.  I enlarged the hole until it was about 1.56" in diameter.  I then finished the exposed raw wood with Titebond II diluted with water and sanded.  I stuck another strip of PTFE tape (G) inside the focuser hole, opposite where the focusing rod will go.  Then I put it all together, and it worked just fine.

Update 1: I added knobs.  I had some oak circles from using a hole saw on some piece of oak some time ago, and after sanding them (by putting on a bolt and spinning with a drill against a sanding block), I press-fitted them on the focusing rod.  If it starts slipping, I'll drill a hole through the rod and knob and put in a screw.

Thanks: I am grateful to John Wall for the idea of putting PTFE on the focuser tube.

Update 2: I just had a bit of trouble with the wooden thread for one of the adjustment screws getting stripped. Treating the hole with CA glue helped, though.

And I added a screw on one end of the focuser tube as a stop, and I added a screw to hold the eyepiece. Because the focuser tube is only 2" long, so as not to compromise the length of movement, we drilled little depressions in the main block for the screws.

Update 3: And here is a not-to-scale diagram of what the main holes in the block of wood look like.

Monday, January 17, 2011

Various things

It's been cloudy and rainy for a couple of days.

I'll be building a 70mm F/4.3 refractor with my five-year-old son.  Lens and diagonal have arrived ($33, from Sheldon Faworski).  We have a mailing tube of just about the right size.  I ordered some screws and nuts from Amazon to attach the lens to the tube.  I am working on a simplified PTFE-on-PTFE Crayford variant for the focuser, made out of one piece of wood, plus some hardware.  I'll post details once it's done.

I've spent some of the weekend playing with using a Wii remote with an IR pen.  This might be nice for operating Stellarium at public star parties.

Monday, December 27, 2010

Bosch Progressor U234X blade

My super-cheap Harbor Freight jigsaw used to cut horribly crookedly and non-squarely. The recommendation I was hearing was to get a circular saw, but I was scared of kickback. So I decided to try a good blade in the jigsaw.

I ordered a Bosch Progressor sampler pack from ebay, and loaded a U234X blade in the jigsaw. While I was at it, I noticed the jigsaw's shoe wasn't square and fixed it. I set medium speed, and turned off the orbital feature, and made a sample cut of 1/2" baltic birch ply against a guide. It cut very slowly, but once it was done the cut was quite straight and smooth. And only a touch of sanding would be needed. The squareness was off by about 0.3 degrees. (Maybe the shoe isn't quite square enough?)

All in all, it's good enough for me. No need for using a router or circular saw.

In the photo, the test cut I did is the front cut (the photo shows both sides of the cut). The side cuts were done with a friend's table saw. Those cuts are slightly straighter and perfectly square (as far as I can tell), but have a lot more tear-out.

The U234X (T234X is the T-shank version) blade is cool. It's 0.05" thick and has two alternating rows of teeth, one against each cutting surface, which smooth both sides of the kerf.

Friday, November 12, 2010

In praise of hard fiber washers

I got a pack of a hundred 3/8" ID 1" OD hard fiber washers from Amazon's Industrial and Scientific sale on sale for under a dollar as an experiment (the regular price is about $16).  A significant portion of my do it yourself budget seems to be washers, so I thought it was worth trying these.  They're great.  The ones I got are black and not glossy so they're suitable for use inside a telescope without painting.  They are a bit thicker than steel washers and a bit thinner than nylon.  They are super-hard, lighter than steel and of course don't corrode.  I know this post sounds like an ad, and to alleviate that impression, I'm not linking.  But search for "fiber washer" in the Industrial and Scientific store, and sort by price from low to high.

Wednesday, October 13, 2010

Wood Handbook

This looks like a really useful resource on wood.

Sunday, October 10, 2010

Hastings triplets

About two weeks ago, I ordered one of the super-cheap "30X" triplet loupes on ebay for less than $2 shipped (see photo on right). 30X should be 8.3mm (FL = 250mm / magnification, for magnifiers). It came a couple of days ago. To my disappointment, it has turned out to be about 8X (looking on amazon reviews of similar products, this isn't uncommon), i.e., about 31mm. Handheld in my F/4 8" (not the ideal test-bed for this eyepiece!) and pointed at Jupiter it showed significant CA on axis (but it was hard to keep on axis, so I can't swear that the CA was on-axis). I did see one cloud belt, which is about all I can see with that scope. I also tried it on the Double Cluster, and it looked OK, but the AFOV was low.
Today, I used the lens it in a Spenser microscope (just placed it right on top of the eyepiece tube). There it came into its own. I compared it to the Leitz 10X eyepiece (I don't know of what variety) that the microscope came with. The magnification of the triplet was slightly lower. AFOV was about the same, maybe around 30 degrees. Eye-relief was huge (which isn't a plus for me--I like short eye-relief eyepieces). But what was really impressive was the vibrant color and on-axis detail, both significantly better than the Leitz 10X. Despite the magnification being slightly smaller, I could see detail better. The sharpness dropped off significantly in the last 30% of the field.  (Visually, the image was much sharper than in this photo, and the usable area bigger.)
Reading Amazon reviews of similar products led me to the following hypothesis. There are two very-similar loupes being sold out of Asia, both marketed as 30X triplets with 21mm diameter lenses. One variety has "TRIPLET 30X21mm" stamped on it, and it actually is a 30X. The other variety has "30X21mm" stamped on it, and it is close to 10X. It is, nonetheless, a nice piece of glass, but only 10X. (The seller is refunding me my $2.)
Friday night, for $6 shipped, I ordered one of the ones stamped "Triplet" from a US seller whose ebay ads warn against being duped by competitors. The seller avers that his are genuine 30X triplets, and based on an email exchanges with him, I am inclined to trust him (after all, if it's not 30X, he'll have to refund the money, and if he doesn't I'll put in a paypal claim). I should be getting mine in a couple of days, and will report.  I am not posting a link until I've actually tried out the lens.
If that fails, I know a third loupe vendor, out of Canada, who has actually had his optometrist test his 30X Hastings triplets, and found that they are not only 30X, but have AR coatings on one of the surfaces. He sells them for $22.
When it comes, my plan is to bore out a 1.25" dowel and stick the 30X lens in. If it works out, I might even sell a few super-homemade (and not filter-threaded) hardwood triplet eyepieces for some very low price. Or at least give them away to friends. :-)

Thursday, September 23, 2010

Project updates

I'm at various stages of four astronomy DIY projects.  Projects 2 and 3 are linked in that the eyepiece will have narrow usable field of view, and hence will benefit from the equatorial table.

1. Digital setting circles: I bought a bluetooth-based module that can communicate with encoders.  Unfortunately, I can't get the magnetic encoder to work with it.  I think an oscilloscope might be needed to figure it out.  So I may just need to save up for two optical encoders (360 cpr, and then attached via a 1:4 timing pulley setup).

2. Equatorial table: I had routed the sectors, but it turns out that I had miscalculated the center of mass of the telescope, so the cut radii weren't good.  I've been procrastinating recutting them.  Need to get back to that.

3. Hastings triplet eyepiece: Today I ordered a super-cheap (about $1.80 shipped) ebay 30X triplet loupe.  I think it should be a 8.3mm Hastings triplet.  If it works, I hope to drill out a 1.25" wood dowel and mount it inside as a nice planetary 8.3mm eyepiece.  If it works really well, I might try to sell them for $15-20 each.

4. Laser collimator: This is for a friend.  I still need to print and cut out a collimation target, and then collimate the collimator.

Saturday, September 18, 2010

Easy and cheap small thumbscrew

The set screw on my digital calipers has always been bent, which was a nuisance as it didn't let me tighten them.  I finally got fed up and fixed it.  Turns out that it used an M2.5 screw, and I had a whole bunch of these that I bought to fix our laptop.  But it would be nice to have a knurled head.  Well, I still had a lot of #6-40 nylon socket cap screws that I needed two of for my Daisy finder improvement. So I cut the heads off one of the socket cap screws, and drilled through the hex key hole in the cap.  I then screwed the M2.5 screw into the cap, gluing it place with a package of some cheap no-name super glue that I picked up at a grocery store and that I've been very happy with because somehow it never gets stuck in the nozzle like it does with other brands.  I then decided I wanted a bigger knurled part to turn, so I beheaded another socket cap screw, drilled it, and glued it in place.  Doesn't look perfect, but works great.

Binocular mount

I finally made a binocular mount for my faithful Celestron 15x70s.  It's a parallegram mount with five degrees of freedom: (1) the whole thing swivels where it attaches to the tripod, and (2) goes up and down; the binoculars then swivel (3) up and down and (4) left and right, and (6) can rotate a bit side to side.  It sits on a very short tripod as it's designed to be used by seated me and standing children.

Total cost was quite low.  The long dark pieces of wood are pieces of a recalled cherry crib that was being given away for scrap wood on Craigslist.  Most of the rest of the wood is 1/2" Baltic birch leftover from the 6" F/5 made for my friend, for some parts laminated to approximately 1" thickness.  There are a bunch of 1/4-20 carriage bolts and knobs from Amazon's Industrial and Scientific store.  I had some leftover PTFE for the main azimuth bearing, and purchased some cheap PTFE washers from Amazon for a low price (the price has now gone up by an order of magnitude).  The hideous counterweight is a bubble wrap envelope full of sand, duct taped all around.  The first iteration used a brick, but I was worried that a kid might whack someone on the head with it, and so bubble wrapped sand is better.

It was pretty easy to make.  I used a router for some round pieces, like the semicircular binocular attachment, but polygonal pieces cut with a hand saw would have worked just as well.

The azimuth bearing was the most complicated part.  It's basically scaled-down Dobsonian azimuth bearing: there are three PTFE pads inside, which ride on a CD (two out of my three Dobsonians ride on vinyl records).  This then bolts to tripod platform.

The tripod is entirely home made, too.  I once ended up buying twelve feet of 1.25" PVC conduit at Home Depot or Lowes because I needed a few inches worth for a focuser.  I expected I would eventually find a use for it, and hereby I did.  The tripod platform is a round piece of 1/2" Baltic birch, with some square poplar rods glued underneath, between which the PVC legs sit, attached with a carriage bolt.  To keep the legs from sliding apart too much, I glued three pieces of webbing, I think scrapped from a car seat or feeding seat, glued to the legs with Shoe Goo, and then screwed into place for additional safety.

I may later make a post with more detailed photos, but it was all fairly simple.  One thing that took me a bit of time to figure out is the brown block of wood that the semicircular binocular attachment attaches to.  It is a rectangle of cherry, with an up-down 1/4" hole and an across 1/4" hole.  The latter hole has a permanently mounted carriage bolt.  I used a 5/8" Fortsner bit to dig a deep well for the head of that bolt so that the up-down bolt would be able to sit to the left of that head.  I then filled the well with JB Weld for strength.

Saturday, September 4, 2010

Altitude brake

My Dobsonians move very smoothly.  The problem with that is that if I am showing things to the public, it is easy for people to push the scope away from the object, especially in altitude.  Before the last public star party, I made a little altitude brake, based on ideas on Cloudy Nights.  I used the router to cut a plywood disc the size of the altitude bearings (7" diameter) on my 13" scope.  (Actually, one could just cut a triangular piece with a hand saw.)  A plywood strip (with a plywood pad on the other end) is glued to it as a handle.  I attached three grippy rubber pads (one could put silicone sealant pads, too) near the circumference.  A bolt keeps the handle immobile, and a big 1/4"-20 carriage bolt runs from the inside of the mirror box, through the altitude bearing, through the disc, and then there is a fender washer and a knob to adjust tension.  The handle is bolted to the rocker box.  At low tension, movement is slowed down, but still smooth, despite the grippy pads.  At full tension, movement is stopped.  The original design I was following used a spring, but that doesn't seem to do anything.


I also made a smaller 2.5" version with Velcro hook pads just to slow down, but not stop, movement.  I didn't try it in the field, though.

Daisy red dot finder modifications

The Daisy red dot sight (the best price I've seen was about $8 at Walmart, but last I checked, my local stores didn't have it) makes a decent non-magnifying finder for telescopes. I have them on two of my reflectors, and the third reflector has the Galileo version.  Mounting requires a dovetail.  One option is to take a piece of wood of the right thickness, and then file a roughly shaped dovetail.  Another option is to take a piece of wood, and screw on washers of the right size for the dovetail to fit around.  It's a good idea to mount it offset from the scope for comfort.

A few modifications make the Daisy finders nicer to use.

1. Resistor.  The stock sight is designed for shooting in daylight, so the red dot is too bright for night use.  You can solder in a resistor (I think probably 2K-5K ohm, depending on taste), or you can fold a resistor in half, put a piece of paper between the leads, and put this resistor sandwich between the battery and a contact.  Even better, you can buy a 5K or 10K ohm trimmer pot (e.g., at Radio Shack), drill holes for the leads, and solder wires in place.  Then you can adjust brightness.  The photo shows the version with the pot.

2. Altitude/azimuth adjustment.  The stock sight needs a screwdriver for adjustment.  Since the sight needs to be adjusted from time to time (or even every time, as on my 13" split-tube scope), and using a screwdriver in the dark is no fun, it would be nice to have tool-free alignment.

On the Daisy that's on my 13", the azimuth adjustment screw has a hex nut (attached with some thread locker, I assume) that can be easily turned by hand.  Only the altitude is an issue.  What I did for the altitude adjustment is I removed the screw and turned it upside down so the hex nut is on top.  That nut wasn't big enough to turn with comfort, so I used Super Glue (or some other cyanoacrylate glue) to glue a larger hex nut on top of it.  Works just fine by hand.

The Daisy on my 8" is an older model with round (!) nuts.  The adjustment screws are #6-40, a bit less than an inch in length.  Amazon's Industrial and Scientific store had a really cheap pack of 100 black nylon socket cap screws (about 50 cents), so I got that.  I was a bit worried if nylon screws would work well.  But they did.  The azimuth adjustment was straightforward: I just replaced the stock screw with the nylon socket cap screw, and the knurled head of the screw nicely turns by hand.  The altitude adjustment was moving poorly with the first screw I put in.  I removed it, and put in another, and it was fine.  Maybe there was something wrong with the thread in the sight, or maybe the screw wasn't good.  But, hey, I had 98 others at that point.  Looks good, too.

Finally, I trimmed the screws right outside the nuts by cutting them with kitchen scissors.  That also spread out the ends of the plastic screws, which should keep the nuts from coming off them.  But for good measure, I took a soldering iron and squashed the part sticking out of the nut, so the nut wouldn't spin off.  (If I need to exchange screws, I can always trim with box cutters.)  I went for nylon screws in the first place because they were so cheap, but in this application, they're also easier to work with (no need for any thread locker or hacksaw), and they won't rust.

The only issue is that (as of Sept. 4, 2010) the price on the screws has gone up to about $6.  Fortunately, they still have a pack of 50 of white versions of these screws for 82 cents.  If you have Amazon prime, or are doing a $25 order, the shipping will be free.  (If you can't get free shipping, you can paypal me the price of a stamp and if I still have enough, and there aren't too many requests, I can send you two of the black ones.  And maybe even a resistor if you want.)

3. Removing coating.  The stock sight comes with a lens that's coated with a dark reflective coating.  The sight is still usable, but you can't see dimmer stars through the lens.  That's not a big problem as you can keep both eyes open and see the stars with the other eye, but stripping out the coating is a nice idea.  This was hard work--about an hour for each sight I did this to.  And one of my sights now points differently from before--I don't know why.  To get it aligned with the scope, I had to angle the dovetail mount on the scope quite a bit.  The image also isn't as neat a dot (and some have seen ghost images).  All in all, I still think it's an improvement, though just barely worth it given the work.

The first step was to remove the lens--I can't remember if there was more than one.  There is a plastic retaining ring holding the lens in place.  Remove that first.  I did it by use of a jeweler's screwdriver, wedging it in behind it.  Once when I did it the ring got creased--it's not so strong--but it was still fine.  Be careful that the lens not fall out, as you will need to note the direction the lens is pointing.  Then remove the lens assembly.  Make careful note of the direction in which the lens is pointing--one side is coated, and the curvature is only on one side.  If there is more than one lens, do it for all of them.

Now, it's time for the hard work of polishing off the coating.  I don't have a satisfactory method.  I used two different polishing compounds: toothpaste plus water, and baking soda plus water.  Generally, I first did the toothpaste, and then moved on to the baking soda.  I applied them with denim.  I did this by hand, which was slow and inefficient.  The other thing I tried was to wrap the cloth with polishing compound around the handle of a screwdriver, duct tape it into place, load the screwdriver blade into a drill, and run the drill.  Eventually, you notice that the coating in the middle is disappearing.  It's really frustrating to get every spot off near the edge.  Some you may just want to live with.  Once done, wash, dry and put back in.

Tuesday, August 31, 2010

Cheap hardware

I've lately noticed that Small Parts has discounted a lot of their inventory in Amazon's Industrial and Scientific store. As long as one gets free shipping with a $25 order or with Amazon Prime, the prices are lower than at my local hardware stores (and if one counts the gas, much lower). For instance, I needed two 1/4-20 knobs for a tailgate. Small Parts had a pack of five nice three-lobe female 1/4-20 knobs for about $1 (one can browse all their knobs by searching for "1/4-20" dimcogray). I needed three #6-32 collimation screws for a laser collimator. I got five really nice mil-spec stainless steel screws for a total of 30 cents (their mil-spec inventory seems really highly discounted)--my local hardware store has zinc plated #6-32s for about 12 cents each. Yesterday I needed two socket cap #6-40 screws for one of my Daisy RDFs, so I could adjust them by hand. A pack of fifty nylon socket cap screws was about fifty cents. (I am guessing that at Lowes they would have tried to sell them for about $0.75 for two, and I'd have to pay for gas.) I also bought two timing belts and timing belt pulleys for a $1.63--I'd have paid about $10 plus shipping at SDP-SI.
A lot of these items are marked as heavily discounted, by up to 90%, so I don't know how long this will last. They can't be making money on a lot of these. It's weird to shop online for items under 50 cents.
My currently going projects are: (a) digital setting circles for my 13" and (b) equatorial platform for the 13" (that's what the pulleys are for). I think I will also make a parallelogram mount for my binoculars.

Sunday, August 15, 2010

Chalkboard paint

I painted the inside of my 13" Coulter Dobsonian with Rust-Oleum latex brush-on chalkboard paint ($10 at HomeDepot;  the two coats I applied used up about a quarter of the 30 ounce can), because I heard that chalkboard paint produces a nice and flat finish.  By and large, it did.  In some areas it wasn't quite as flat as ideally, but those were rougher areas, so the light will be scattered there anyway.  It's the flat and smooth areas that are most important.

I will let it try for a while before putting the optics in, and then there'll be lots of moon out, so it'll be a while before I can seriously try it out.