Saturday, April 21, 2012

Sun funnel done

To get the size of sun funnel I wanted, I had to join two different funnels.  But it works!


Friday, April 20, 2012

More sunspots

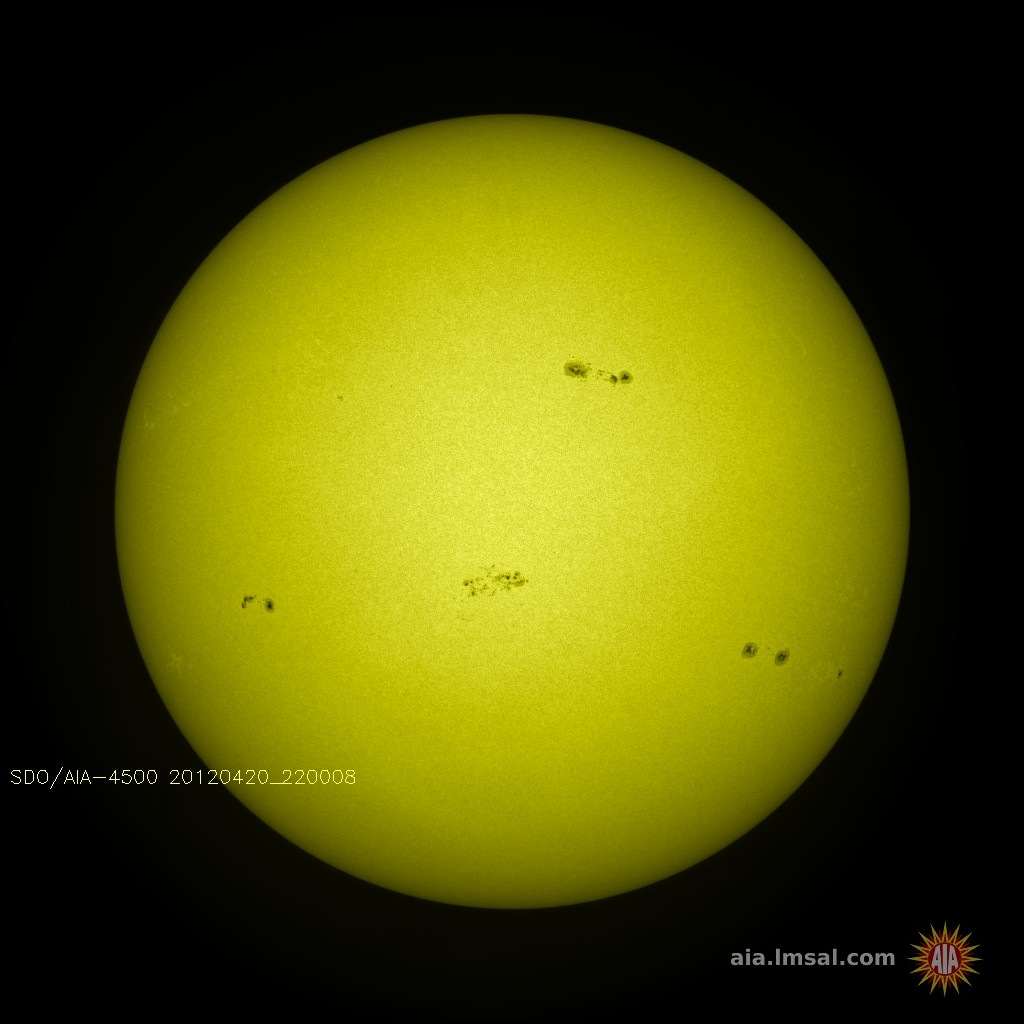
I was handholding the projection screen material in front of my scope for a 4-5" image.  Wow!  Today's sunspots were really impressive.

I noticed that they were very much in pairs.  Apparently sunspots come in pairs with opposite magnetic polarity.

Tuesday, April 17, 2012

Sunspots today

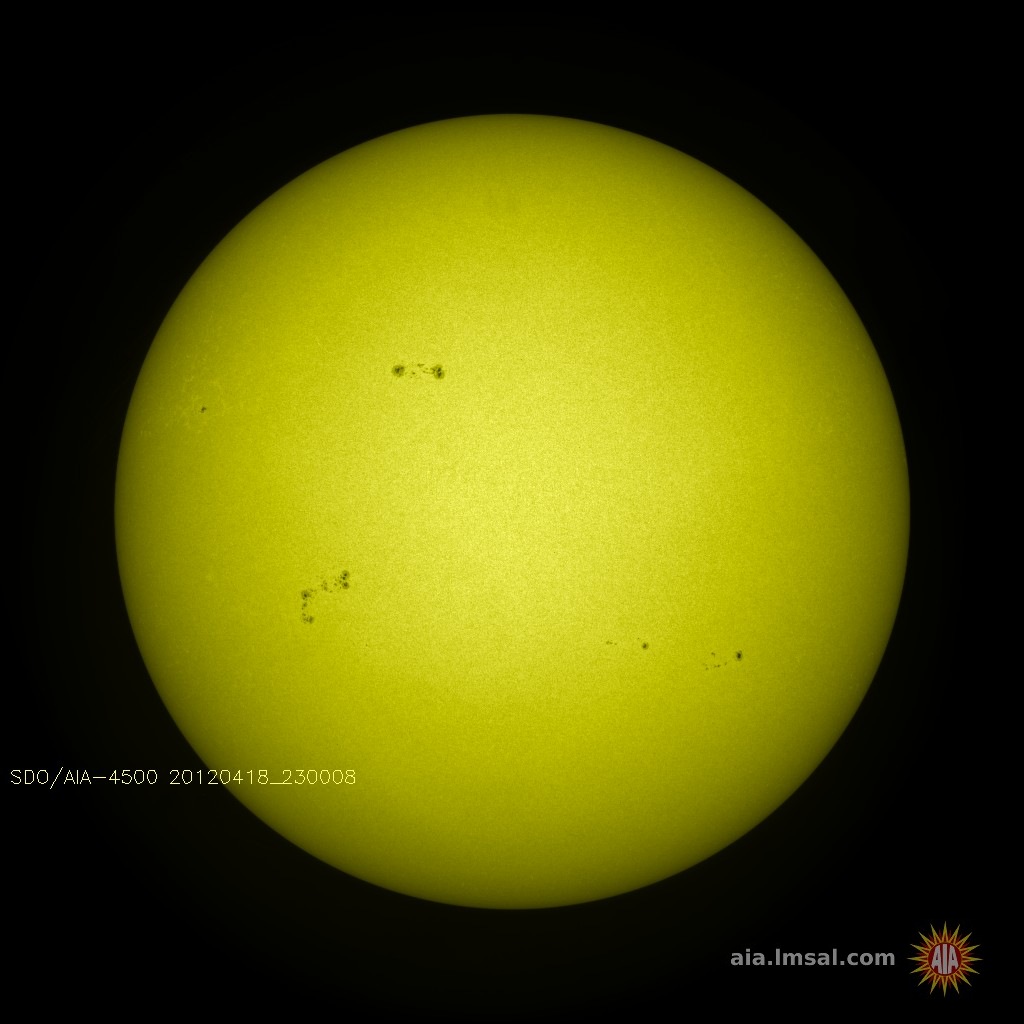
A kind soul sent me a 25mm Kellner eyepiece for solar projection purposes for the cost of shipping.  A nice thing about this eyepiece is that the field stop extends quite far from the lens, and will dissipate any sunlight if the sun goes to the edge of the field.

I played with it today to see how far away from the eyepiece I'd need to get to have a 4" image in my 8" F/4.5 (stopped down to two 3" apertures).  Answer: ~26cm.  When I projected the sun on a piece of cardstock, at that size, I was blown away by the richness of the structure of the sunspots today.  And the sun was quite low, as it was shortly before sunset.  Here's today's LMSAL photo.  I saw the two larger groups but somehow missed the smaller group that's down from center.

It's time to build a sun funnel as soon as my projection material comes.

Thursday, April 5, 2012

Venus

Afocal, Coulter 8" F/4.5, TMB/BO Planetary 6mm eyepiece, with my son's Sony P100 camera.

Hard drive platter as flat mirror

Some time ago, I disassembled some old hard drives with the kids (including one that was donated to the cause by my employer's IT services), and extracted magnets (fun, as long as you're careful) and platters.  The platters gave me the impression of high quality first-surface mirrors, and I've been looking for a use for them.  I've put one into my so far not very successful solar projector project as a heliostat.

I was just playing with looking at stars reflected in this platter through my 15x70 binoculars, with only one eye.  There was some unidirectional glare from Venus, but stars looked pinpoint.  I was only hand-holding the binoculars, so the test isn't great.  And it would have been better if the central hole was blacked out.  This isn't a very demanding test, higher magnification would be much better, but it's a promising start.

Sunday, April 1, 2012

Mars

I've never done very well with Mars, and my best views--never that good--have been with an aperture mask.  With full aperture, I just get a red and white blob of chromatic aberration.

I had a 75mm single-hole aperture mask that I was planning to use in my 8" F/4.5 Coulter for solar projection, but tonight I added another hole to it.  Both holes miss the two-vane spider.  The views of Mars with the aperture mask and a 5mm ortho are great--best I've had.  Two dark areas (one was probably Mare Acidalium) and a bit of polar cap.  I don't know if they're better with two holes than with one--there may be better contrast with one--but they are a bit brighter with two, and I love the easy focusing (with the mask, you see double and you focus by merging the images).

Saturday, March 31, 2012

More solar observing experiments

I am continuing to experiment with my solar projector, which uses a hard disc platter as a heliostat mirror, and two Surplus Shed lenses, one positive with 2600mm focal length, and one negative with -800mm.  While I can see sunspots, I can't see almost any structure in them, and there is a lot of chromatic aberration.  A bit of experimenting suggests that most of the chromatic aberration is due to the negative lens, so I've ordered a -1000mm achromatic lens.  We'll see if that improves things.

While ordering from Surplus Shed, I also ordered a 15mm focal-length Hastings triplet.  If it does not make a good planetary eyepiece--I will certainly will try--I will have a nice 15X loupe, replacing my 15X plastic-lens loupe (which is usable, but only in the center of field).

Monday, March 26, 2012

Solar observing mishap

I was experimenting with solar projection with my 8" scope.  I first stopped up the aperture to about 3".  All was well.  Then I went for full aperture.  The images were sharper.

But then the images went foggy.  And I couldn't get them in focus.  And smoke started coming out.

I disconnected the Kellner and noticed the lens was fogged up.  Turns out that while the eyepiece housing was metal, as it should be for solar work, the eyepiece lenses had a plastic spacer.  Which melted.  The spacer is the black thing to the left of the lenses.

The lenses cleaned off fine with acetone.  But I wonder how I can find a metal replacement spacer.

So, that's a warning for solar work: don't assume that just because the eyepiece tube is metal, the inside is metal, too.

Saturday, March 10, 2012

LunarMap 1.11 for Android

I just posted LunarMap HD and Lite 1.11 in the Android Market (or Google Play, as it is now awfully renamed).  Today's revisions
  • Add satellite features (e.g., Plato B) [HD only]
  • Adds astronaut-named features
  • Improve memory handling
  • Fix bug with selection of feature types
  • Add a little more info about feature types
With this reversion, the HD version contains all official 9099 IAU named features.

I will upload to the Amazon Appstore on Monday if all is well.

Saturday, February 25, 2012

Solar projection scope prototype

Warning: With solar observing, be very careful not to look into the optical train, or you are likely to go blind.  Do not leave the optics unattended.  Watch for children!  Don't let any critters walk into the optical path.  Remember that as you experiment with the device, the optical path may be unpredictable.

I got the following lenses from Surplus Shed:

  • 150mm diameter PMN, 2600mm focal length (stock L3855D, $25)
  • 68.7mm diameter NMN, -800mm focal length (stock L4380, $4)
I cut out holes in the shipping box and mounted the big lens to one side of it.

Next, I cut a hole in a piece of plywood, and mounted the small lens in it, using pieces of an old bike inner tube to hold it in place.  I added two pieces of wood to the bottom of the plywood for a stand.

I had some used hard drive platters.  I used a pair of cheap Harbor Freight helping hands to hold one of the platters as a heliostat mirror (using the alligator clip to hold the platter through a piece of cloth so it wouldn't mar the platter too much). 

I set up the optical train on the driveway.  After some experimenting, I got it working.  Hard drive platter reflects light into the big lens.  About 80 inches further, the small lens stands.  A couple of meters further away (I didn't measure; my calculations suggest 6.3 meters as the correct distance, but it seemed closer to me), in the shade, I have a box with a piece of card stock taped to the side as a projection screen.  

Aiming hard drive platter to reflect the sun was easier than I expected.  (At this point, the safety stuff becomes crucial--make sure the sunlight doesn't get focused in anybody's eyes.  Likewise, make sure no animal walks into the optical train.)  I could see a bright spot reflected from the platter.  I moved the spot onto the big lens.  I could then see an unfocused spot on the ground between the big lens and the small lens.  I centered that spot on the small lens, and put the screen box to catch the image.  I then moved the small lens to focus the image.

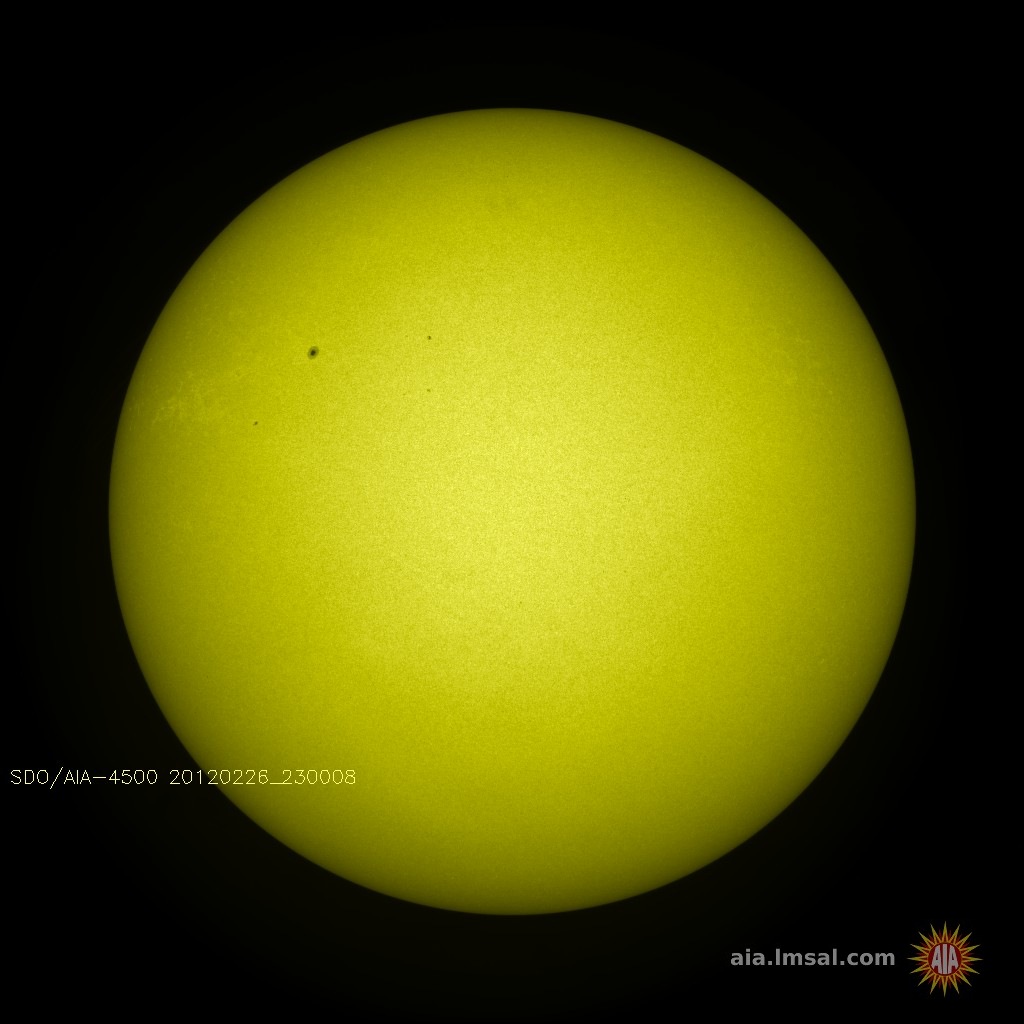
Result: Eight inch image of the sun.  Acceptable chromatic aberration along edges.  Moderately fuzzy.  One clear sunspot.  (Today's solar photo online showed a smaller sunspot near the larger one, and I did not see that.)  

It should work for the transit of Venus.  I hope it will get a bit sharper when I find a good way to collimate the setup, maybe with a laser.  Right now the collimation was all eyeballed (on the other hand, this is very long focal length work, since I am only using a small portion of the 150mm lens since the platter doesn't give much illumination, so it's less crucial.)  I also hope things will improve if align the optical train in such a way as to make the sun be closer to being at right angles to the mirror, which will increase the amount of the primary lens illuminated by the mirror.

At some point, I will try with a 3.5" diagonal instead of the platter, and if it makes a significant difference to quality, I may need to buy a mirror.

While one can no doubt be harmed if fairly well focused sunlight within the optical train hits the eye, it is worth noting that if the big lens is correctly pointed at the diverging lens, at no point in the optical train is there an image of the sun smaller than about 40mm, so the amount of heat concentration is not so great.

Tuesday, February 21, 2012

Shadows and light

I was just looking at Jupiter and Venus, both in the west.  Venus looked slightly gibbous and Jupiter had Io's shadow on it.  It was neat to see that the shadowed part on Venus and Io's shadow both pointed towards the below-horizon sun (after correcting for the upside-down field of view).

I hadn't done much astronomy lately.  I did notice lately that Venus was getting very far in the sky from the sun, and it was gratifying to see this coordinated with the slightly more than half-illuminated face of it.  I suppose it will now be getting closer to it, culminating in the transit this summer.

Monday, January 23, 2012

Solar projection telescope

I'm ordering lenses from Surplus Shed for my big solar projection scope.  The plan is a 150mm PNM objective lens with a 2600mm focal length, followed by a -800mm MNM lens spaced at 1890mm from it.  This should result in 202mm image of the sun approximately six meters away, for an effective focal length 23.1 meters!

I still don't know how I'll direct sunlight into the scope.  My first attempts will use a hard drive platter as a super-cheap mirror.

Sunday, January 22, 2012

Open Star Map for Android

I've compiled and made minor changes to the Google Sky Map application.  In particular, on devices like the Kindle Fire without a compass, it won't go into the auto mode which tracks the sky.  On devices that do have a compass, it should still track, but if you turn off the tracking (lower left corner icon), it will remember that setting (Google set it not to remember the setting, because of users who couldn't figure it out).  You can download the apk for the newly named Open Star Map.

There are a lot of unsatisfactory things about Open Star Map.  For instance, the night mode doesn't change everything.  For another, the catalogs are shallow.

Saturday, January 21, 2012

Google Sky Map now open source

Google has opened up Sky Map: announcement and source code.

Just built it with Eclipse. To build, download the source via svn. Then:

1. Import trunk/app as an existing-source Android 2.3.3 project.
2. In the Project Properties, go to Java Build Path and Libraries.
2.1. Press "Add JARs..." and select libGoogleAnalytics.jar from trunk/app/libs/libGoogleAnalytics.jar
2.2. Press "Add External JARs..." and select the two jars from trunk/tools/libs

Thursday, December 22, 2011

ScreenDim and RootDim (formerly SuperDim) apps for Android

1. I put in the Android Market a new paid screen dimmer, ScreenDim, loosely based on my SuperDim code. ScreenDim allows you to dim your display below what the OS normally allows, does not need root, and does both backlight and contrast adjust (at least on backlit devices). (The contrast adjust function is visually like ScreenFilter functionality, but my testing suggests that ScreenFilter may slow down 2D rendering by 30%, while I haven't observed a significant slowdown with ScreenDim.) You still have profiles. But because this app is aimed at non-root users, I removed ChainFire3D integration as well as extra LED support (I may do something in the latter direction if there is an open API.) It will be interesting to see how ScreenDim does on OLED devices on which SuperDim didn't work. There is a free three day trial version.

2. I renamed SuperDim to RootDim to differentiate it from ScreenDim.

3. I have not abandoned RootDim/SuperDim. I uploaded a new version to the Market that should give better control over LEDs. You can, for instance, set the power LED to turn on when and only when charging, or when the device is on, or never, etc. I think there are still some bugs in this functionality, and the functionality does not turn on automatically after a reboot until the bugs are worked out. But it's a start.

Wednesday, December 21, 2011

SkySafari out in Android Market

SkySafari is now up on Android Market.  I've been one of the beta testers.

Here's my five-star Market review:
This is easily and by far the best astronomy software for Android devices.  I think it's better than Stellarium for the desktop.  Superb coverage of the solar system (planets, minor planets and comets) and deep sky objects.  Good information on various objects.    It's great to have outlines of wide deep sky objects.    The Pro version adds tons of stars.  From my experience with Palm apps, for serious star-hopping and identifying of faint objects with a decently sized telescope (I have a 13"), one really should benefit from having the greater depth of coverage that the Pro version provides over the Plus version.    Hint 1: If you have a somewhat slower device, you can greatly improve smoothness by setting the Horizon to Transparent with Line and turning off Milky Way textures.  Hint 2; While the built-in night mode works well, it doesn't affect the on-screen keyboard keyboard or any soft keys on screen if your device have them.  For rooted devices, you can install ChainFire3D and use its night mode, and for unrooted devices, you might try my own free "GB keyboard with optional night mode".

Monday, December 5, 2011

LunarMap HD and Lite officially released

I finally got to the 1.00 release.  It's now in the Market:
The screenshot shows the Lunar Reconnaissance Orbiter's false-color far-side map (HD version).

And here is the latest Lite apk file.

Sunday, November 27, 2011

Official release of Android keyboard with red night mode theme

Astronomy apps may change most of the screen to red, but they leave the keyboard alone.  If you have a rooted device, you can get ChainFire3D to fix this problem which provides a device-wide red screen mode, but for non-rooted devices, that isn't satisfactory.

To remedy this, there is my Android keyboard with red nightmode theme, now released here.

Wednesday, November 23, 2011

Solar projection

I made a little cardboard solar projection box for my 8" Coulter, and a mask to cover all but 2.9" of aperture.  I read a hint to put two holes in to get the resolution advantages of the aperture--I may try that one day.  Or I might open up more of the aperture and use IR-rejection film, though that may be risky for the eyepiece.

It's easy to point the scope at the sun--you just move the scope until the shadow of the tube is as small as possible.  For safety, I make sure all the observers are on the side of the telescope away from the eyepiece.

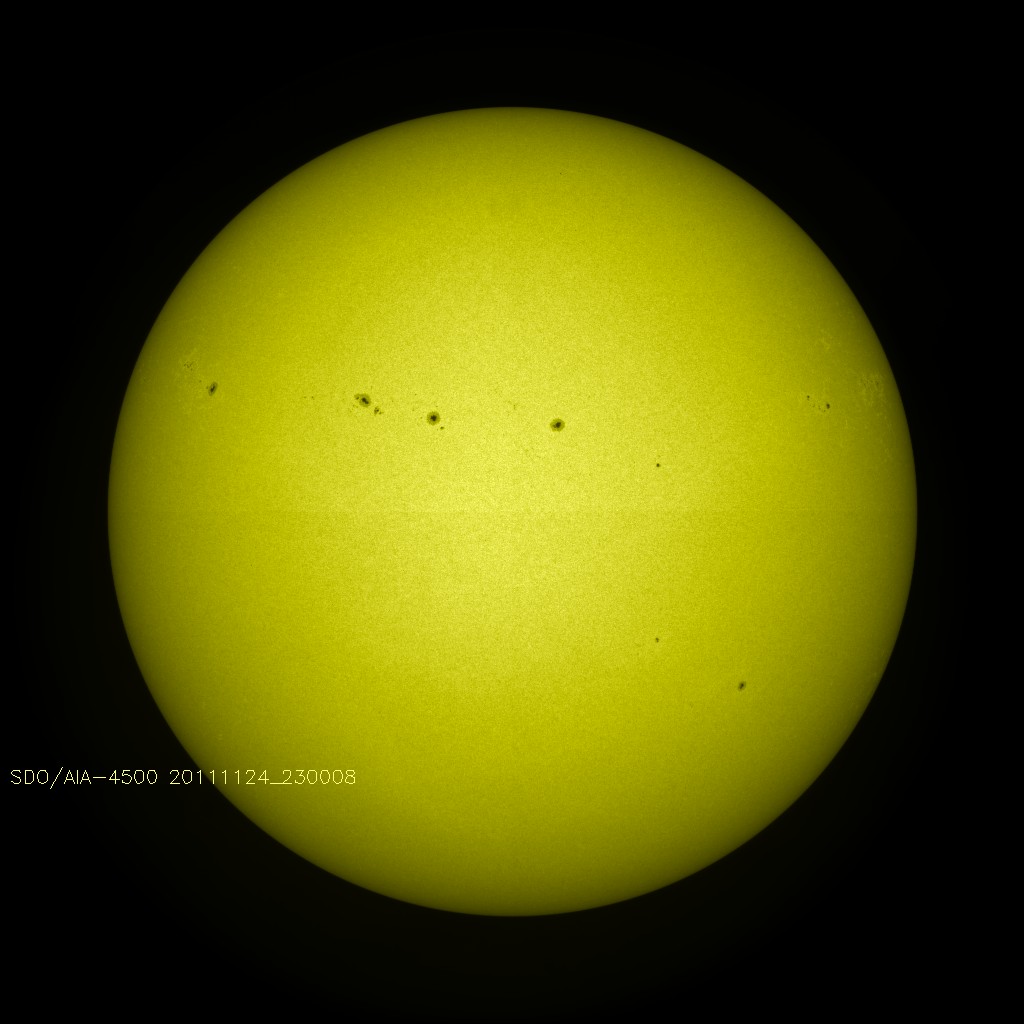
With a 27mm Kellner eyepiece, after I got things into focus, the box did show sunspots.  (Note that the big yellowish smudge on the right is glue on the inside of the box, rather than a solar feature.  I will have to stick in a clean piece of card paper there.)  The image was actually a little too bright to view comfortable.  The photo of the projected image worked, though, once I set the camera to minimum aperture and exposure time.  I need to make some registration marks on the projection screen, so that I can take two photos in the future, one with exposure for the bright disc and the other with exposure for the registration marks, and use the registration marks to undo the skewing you see in the photo.

The sunspot positions match those here.

The aperture mask was quite warm, but the eyepiece didn't seem to get hot.

Solar observing safety precautions: Do not look through the eyepiece.  Do not look at the sun naked-eye, either.  Stop down the aperture to prevent the eyepiece from shattering from the heat (which is a waste of an eyepiece, and might cause harm from flying shards), and push telescope away from the sun every couple of minutes to cool off.  Don't use an expensive eyepiece.  Never use the cheap solar filters that screw into the eyepiece.  They can shatter while you're viewing and the sunlight is then likely to blind you (and I had one as a kid that faded with time--it got less and less dark! fortunately, I never used it in the telescope).

Sunday, November 20, 2011

Sunspots

I've tried to see sunspots by using solar projection with a 68mm refractor, with no luck.  Last night, close to sunset, I pointed my 8" Coulter towards the sun, with a 30mm eyepiece and a card in front of it.  I got a very sharp image with a number of distinct sunspots.  Couldn't see any detail in the spots themselves--they were just dots--but they were there.

Normal solar safety rules apply here: Don't ever look through a telescope or eyepiece pointed in the vicinity of the sun.  (I took care of that by making sure that all the observers were on the side of the scope opposite to the eyepiece.)  Cover up any magnifying finder scope (a red dot finder is fine--just don't use it!).  Don't look at the sun while pointing the telescope (my best method for pointing was to move the scope until the size of the shadow red-dot finder was minimized, and then to wiggle the scope until I saw solar glare on the card).  Don't keep the scope pointed at the sun for too long--give it some cool-off time between observations.

On reflection, I should have stopped down the aperture to prevent eyepiece melting.  I didn't have the eyepiece melt, but maybe that was because it was close to sunset.  I am going to try to make a more comfortable projection setup today.  This is all a sort of preparation for the transit of Venus in June 2012.

My solar viewing was before the Waco star party.  Later that night, we were showing Jupiter to girl scouts, waiting for clearings between clouds.  I think everyone who stuck around got a view.  Some of the time the seeing was horrid, but at one time I did see a fuzzy barge atop the northern belt.  After the girl scouts left, the sky mostly cleared up.